|
Battle of Ebelsberg
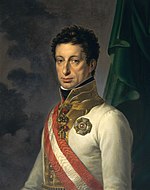
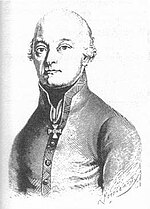
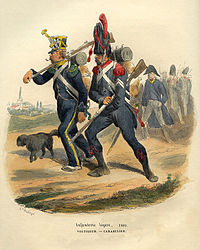
current battle Napoleon in command Napoleon not in command The Battle of Ebelsberg, known in French accounts as the Battle of Ebersberg,[a] was fought on 3 May 1809 during the War of the Fifth Coalition, part of the Napoleonic Wars. The Austrian left wing under the command of Johann von Hiller took up positions at Ebersberg on the Traun river. The French under André Masséna attacked, crossing a heavily defended 550-meter-long bridge and subsequently conquering the local castle, thus forcing Hiller to withdraw. Ebelsberg is now a southern suburb of Linz, situated on the south bank of the Traun, a short distance above the place where that stream flows into the Danube River. Separated from the main Austrian army by the battles of Abensberg and Landshut, Feldmarschall-Leutnant Hiller retreated east to Linz by 2 May with the three left wing corps. The Austrians hoped to slow the French advance towards Vienna. The leading elements of Marshal Masséna's corps overran Hiller's rear guard on the west bank of the Traun on the morning of 3 May. In the rout that followed, the first French infantry brigade rushed the bridge and got into the streets of Ebelsberg. At this point, the Austrians began to fight back effectively. To keep from being thrown into the river, the French committed an entire division to the street fight, in which the Ebelsberg castle loomed as the key position. After Masséna threw in a second division, the French finally ejected the Austrians from the castle. Unwilling to recapture the town, Hiller ordered his artillery to set fire to the place. In the blaze that followed, hundreds of wounded soldiers from both armies died. The battle and the heavy casualties were unnecessary because Hiller was already flanked out of position by a second French corps that crossed the Traun upstream. BackgroundOn 10 April 1809, the Austrian army of Archduke Charles, Duke of Teschen invaded the Kingdom of Bavaria, an ally of Emperor Napoleon I of France. During the first week of war, Napoleon's deputy, Marshal Louis Alexandre Berthier, mismanaged the deployment of the Franco-German army. Nevertheless, the archduke was unable to take advantage of his opportunities because of the slow marching speed of his troops.[3] Napoleon soon arrived on the scene and, in the first major clash on 19 April, Marshal Louis Davout won the hard-fought Battle of Teugen-Hausen. Thanks to his victory, Davout was able to link up with the main body of Napoleon's army near Abensberg that evening.[4] At the Battle of Abensberg on 20 April, Hiller arrived from the south to take command of Feldmarschall-Leutnant Archduke Louis of Austria's V Armeekorps and Feldmarschall-Leutnant Michael von Kienmayer's II Reserve Armeekorps, in addition to his own VI Armeekorps.[5] Before the battle, Hiller's strength had been weakened by the detaching of Feldmarschall-Leutnant Karl Friedrich von Lindenau's division from V Armeekorps[6] and General-Major Andreas Schneller's cuirassier brigade from II Reserve Armeekorps to the main army, Andreas Schneller's brigade,[7] plus Feldmarschall-Leutnant Franz Jellacic's division from VI Armeekorps to hold Munich.[8] At Abensberg and at the Battle of Landshut on 21 April, Emperor Napoleon I of France's army roughly handled Hiller's command and forced the Austrian to withdraw to the southeast, away from Archduke Charles and the main army.[9] Between 19 and 21 April, Hiller lost 12,140 soldiers, 11 guns, and 328 wagons from V and VI Armeekorps. His wing shrank from 42,000 troops to around 27,000 to 28,000 by the evening of 22 April.[10]  On 22 April, Napoleon marched north with major forces to defeat Archduke Charles at the Battle of Eckmühl.[11] Unaware that the main army had retreated north of the Danube River, Hiller turned to face a weak pursuit force.[12] He inflicted a sharp check on Marshal Jean-Baptiste Bessières at the Battle of Neumarkt-Sankt Veit on 24 April. Apprised of the fact that Charles had been defeated, the Austrian wing commander quickly pulled back to the southeast.[13] On 24 April Charles sent a message to Hiller ordering him to retreat to Linz, cross to the Danube's north bank, and join the main army.[14] Hoping to overtake and destroy Hiller, Napoleon sent two columns after his foe. The emperor directed Marshal Louis Davout's III Corps, Masséna's IV Corps, and General of Division Dominique Vandamme's VIII Corps along a northern route via Passau on the Inn River. The II Corps of Marshal Jean Lannes and Bessières' force took a more southerly route through Burghausen on the Salzach River.[15] On 26 April, General of Division Claude Juste Alexandre Legrand of Masséna's IV Corps clashed with Hiller's rear guard, led by Feldmarschall-Leutnant Josef von Dedovich, at Schärding[16] and seized the bridge over the Inn. That same day, another of Masséna's divisions occupied Passau, capturing 400 Austrians.[17] Meanwhile, Hiller was enjoying his independence from Archduke Charles, who was far away in Bohemia. Also, he was in easy communication with Emperor Francis I of Austria, who wished to exert his influence on the campaign.[15] Encouraged, Hiller came up with a plan to counterattack Masséna on 27 April and ordered Feldmarschall-Leutnant Emmanuel von Schustekh-Herve to implement it. Nothing came of this scheme, and the Austrian retreat continued toward Linz.[18]  On 1 May, Legrand and 1,400 troops caught up with Schustekh's 850-man rear guard between Riedau and Kallham. The Dragoon Regiment of the Grand Duchy of Baden charged the 3rd battalion of the Jordis Infantry Regiment # 59, which was drawn up in square. Waiting until the foot soldiers fired a volley, the dragoons then charged and broke into the square. After their commander, Oberstleutnant Beck, was cut down, 706 officers and men of the Jordis battalion laid down their weapons. Two squadrons of the Kienmayer Hussar Regiment # 8 suffered 10 killed, 50 wounded, and 23 captured. The Badeners reported losing only three killed and 10 wounded, though a large number of their horses were killed.[19] There was a clash between General of Division Claude Carra Saint-Cyr's vanguard and General-Major Frederick Bianchi, Duke of Casalanza on 2 May at Räffelding, three kilometers southeast of Eferding. The Baden Dragoons lost 14 casualties, while Austrian losses were unreported.[20]  After abandoning Regensburg, Archduke Charles first retreated to Cham on the border of Bohemia, where he reorganized his army. From there he marched for České Budějovice (Budweis). Fearing Napoleon might follow him into Bohemia, Charles wrote to Archduke John of Austria on 3 May that he planned to fight at Budweis. As late as 6 May, the main army remained in the vicinity of that city. However, detachments under Feldmarschall-Leutnant Johann von Klenau and General-Major Karl Wilhelm von Stutterheim operated closer to Linz on the north side of the Danube.[21] On the night of 2 May, Emperor Francis left Linz, crossed the Danube, and hastened to join the army of his brother Charles. He left instructions for Hiller to delay Napoleon's advance by taking up positions behind the Traun at Ebelsberg and Lambach. If this failed, Hiller could defend the line of the Enns River farther east.[2] Hiller posted General-Major Armand von Nordmann's 3,000-man brigade near Lambach to guard his south flank.[22] Francis appointed his brother-in-law Archduke Maximilian of Austria-Este to command Vienna, but most of the garrison was poorly trained.[23] On 2 May, Marshal François Joseph Lefebvre's Bavarian VII Corps reported sparring with Jellacic at Golling an der Salzach south of Salzburg. Bessières with his cavalry and Lannes with General of Division Nicolas Oudinot's II Corps infantry division reached Wels on the Traun to find the bridge burned. Generals of Division Louis Vincent Le Blond de Saint-Hilaire (III Corps), Gabriel Jean Joseph Molitor (IV Corps), and Joseph Laurent Demont (III Corps) were nearby with their divisions, and Napoleon arrived at Lambach. Vandamme's Württemberg VIII Corps marched in the vicinity of Riedau. Davout's III Corps was due to arrive in Passau on 3 May, while Napoleon ordered General of Division Marie François Rouyer to leave Regensburg and march to Passau.[24] The 12,000-man Imperial Guard under General of Division Frédéric Henri Walther reached the vicinity of Braunau am Inn at the beginning of May.[25] BattleRear guard action Early on 3 May, General of Brigade Jacob François Marulaz set out from near Eferding with Masséna's IV Corps cavalry division. Following the mounted troopers, in order, were the infantry divisions of Generals of Division Michel Marie Claparède (on loan from II Corps), Claude Legrand, Carra Saint-Cyr, and Jean Boudet. The French cavalry ran into a small infantry ambush at Wilhering, which is on the Danube about halfway from Alkoven and Linz. At 9:00 AM, the column marched into Linz and took the road south toward Ebelsberg.[2] At 3:00 AM, Hiller put his soldiers on the road. He directed Kienmayer's small II Reserve Armeekorps to lead the march, while the main bodies of the V and VI Armeekorps followed. That morning, the Austrian wing commander deployed four of his eight brigades as rear guards under Bianchi, Schustekh, General-Major Josef Radetzky, and Feldmarschall-Leutnant Karl von Vincent.[26] As the Austrian wagon train filed across the bridge at Ebelsberg, Hiller's staff lost control of the situation, the drivers panicked, and the roadway became jammed with retreating vehicles and troops. Eventually, the mob of troops and wagons squeezed across the span and even Bianchi was across the Traun by 9:00 AM[27] with the Duka Infantry Regiment # 39 and Ignaz Gyulai Infantry Regiment # 60.[28]  However, Schustekh was still somewhere to the southwest so Vincent and Radetzky drew up their forces on the west bank and waited for their colleague to make his appearance.[27] Vincent had the Benjowsky Infantry Regiment # 31 and Splenyi Infantry Regiment # 51[29] of General-Major Josef Hoffmeister's brigade under his orders. He placed one battalion in the village of Klein München and the other five between there and Scharlinz. He screened the infantry with the Rosenberg Chevau-léger Regiment # 6. Radetzky, with two battalions and six squadrons, deployed on Vincent's left, watching for Schustekh.[27] Radetzky's brigade included the Gradiskaner Grenz Infantry Regiment # 8, Merveldt Uhlan Regiment # 1, and Archduke Charles Uhlan Regiment # 3. Smith gives Radetzky 16 squadrons, while Petre counts only six.[30] Schustekh finally appeared with the Kienmayer Hussar Regiment # 8 and General-Major Otto von Hohenfeld's brigade, the Klebeck Infantry Regiment # 14 and Jordis Infantry Regiment # 59[30] and began crossing the bridge. At about 10 AM, Marulaz's troopers came under fire from the woods north of Scharlinz. While waiting for infantry support,[31] he drew up the French 3rd, 14th, 19th, and 23rd Chasseurs à cheval in the first line, the Baden Light Dragoons, Grand Duchy of Hesse Garde Chevau-léger, and Württemberg Chevau-léger Regiments in the second line.[30] Soon, General of Brigade Louis-Jacques Coëhorn's troops appeared and, at Masséna's personal command, attacked Klein München with the bayonet.[29] Coëhorn's brigade included the 4th battalions of the 17th, 21st, 26th, and 28th Light Infantry Regiments, the Tirailleurs du Po, and the Tirailleurs Corses.[32]  By this time the Rosenberg Chevau-légers had withdrawn across the bridge at Vincent's orders. The Austrian defenders of the village put up a poor fight and Coëhorn's men drove them from their positions. From the direction of Wels, Bessières showed up[33] with General of Brigade Hippolyte Piré's brigade,[22] a hussar and a chasseurs à cheval regiment, and attacked Radetzky who covered Schustekh's retreat. Radetzky put up a gallant resistance, for which he later earned the Commander's Cross of the Military Order of Maria Theresa. Meanwhile, Hoffmeister made a stand behind the millstream on the west bank. His efforts were futile as French infantry and cavalry charged forward. Seeing that the situation was critical, Vincent ordered a retreat and soon the Austrians were stampeding across the bridge in panic.[33] At about 11:00 AM, French troops reached the 550-meter-long (1,800 ft) bridge.[34] The men of the two brown-coated Tirailleur battalions burst through the gate at the west end and raced across the span. The Austrian artillery took the bridge under furious fire, killing friend and foe alike, but its fire was unable to stop the French advance.[35] The bridge had been prepared for burning by Captain Simbschen of Hiller's staff, but the officer was not on the scene to give the orders to set it on fire.[36] Hiller, who had been unconcernedly lunching on the Ebelsberg Castle terrace, finally woke up to the danger and began issuing orders.[37] Cut off by the swift French advance, a squadron of Uhlans swam their horses across the river. An Austrian staff officer grabbed a French shako, crossed with the enemy infantry, and escaped into the town. Generalmajor Ferdinand, Graf Bubna von Littitz became a prisoner, while at least 500 of Hoffmeister's men and large numbers of other soldiers surrendered.[35] The 2nd battalion of the Klebeck Regiment of Schustekh's force was captured in a body with its colors. Smith says Kerpen # 14 was captured but this is a misprint.[30] Other soldiers drowned trying vainly to swim across the snow-melt swollen river.[36] Fight for Ebelsberg When Kienmayer's soldiers reached Ebelsberg that morning, Hiller sent them marching on to Asten, Austria. He halted the V and VI Armeekorps troops on the heights east of the town where they began to cook breakfast. Hiller belatedly sent three battalions of Vienna Volunteers to occupy the town, three companies of the Lindenau Infantry Regiment # 29[27] (detached from III Armeekorps)[38] to garrison the castle, and an artillery battery to take position near the castle. He failed to order any positions to be fortified before going to the castle for his noontime repast.[27] Yet, Ebelsberg was an excellent defensive position, with the dominating hill-top castle on the north side and two-tiered heights rising behind the town. Coëhorn immediately led a column up the street to the left toward the castle, but the defenders mowed down the front ranks and killed the general's horse. His other troops in the town found themselves under a deadly fire from windows and rooftops, while the numerous Austrian guns on the heights sent projectiles crashing through the streets. One enterprising artillerist, Karl Lenk, inflicted serious losses on the French with his single cannon before retiring to join the other guns on the heights.[35]  Claparède added his two other brigades under Generals of Brigade Joseph Lesuire and Florentin Ficatier, to the battle.[34] Lesuire's command included the 4th battalions of the 27th, 39th, 59th, 69th, and 76th Line Infantry Regiments, while Ficatier led the 4th battalions of the 40th, 64th, 88th, 100th, and 103rd Line.[39] These troops were joined by the elite company of the 19th Chasseurs a Cheval and a section of artillery.[35] Masséna organized a 20 gun artillery battery on the west bank to counter the devastating Austrian artillery fire.[40] An Austrian counterattack from the north threatened the French in the town, but by 1:00 PM, Lesuire's brigade had taken the marketplace and was trying to outflank the enemy near the castle. As Lesuire's brigade faltered, Ficatier assaulted the castle in three columns but was repelled.[34] Two battalions of Vienna Volunteers defending a large cemetery drove back a French charge with musketry, then launched a bayonet charge that drove their enemies back. Meanwhile, a third battalion of volunteers took the French in flank and rear from the side streets.[41] The three battalions of Vienna Volunteers charged into the town and, reinforced by four infantry battalions, drove the French toward the marketplace.[34] The 4th and 5th Vienna Volunteers and the Lindenau Regiment were involved in these attacks. As they pressed forward, they captured many prisoners including the commander of the Tirailleurs du Po. Aided by two guns firing point-blank canister rounds, the French desperately held onto the marketplace in house-to-house fighting. Oberst Maximilian Baumgarten was wounded while two French colonels were killed. Austrian pioneers and howitzer shells began setting some houses on fire, adding to the hellish atmosphere. As Masséna raged helplessly on the far bank, some Austrian pioneers set the end of the bridge on fire, but the strong wind blew out the flames.[42]  At this critical moment Colonel Jean Pierre Pouget's 26th Light Infantry Regiment appeared at the head of Legrand's division. Amazingly, Pouget got his troops across the bridge with minimal loss. Coëhorn appeared and gave the order, "You are going to follow this street to a chateau occupied by the enemy. You will attack it." Pouget obeyed and, after a climb, led his men within 40 paces of the castle. The castle, now garrisoned by men of the Jordis Infantry Regiment, suddenly erupted in flame and the blast of musketry cut down many French soldiers. Unhit, Pouget noticed that the deadliest fire came from a barred and loopholed window above the castle gate. He directed his men to silence the Austrian fire, but within ten minutes, three officers and 53 carabiniers were down. As the Austrians shot down the leading carabinier company, the rest of his light infantrymen waited in a column, unable to fire.[43] Losses mounted alarmingly, and Pouget finally sent for a Lieutenant Guyot who was known as a crack shot. Guyot got within five meters of the deadly window and began firing shots as fast as loaded muskets could be handed to him. Seeing his example, others began doing the same and the fire from the window began to slacken. Sappers rushed forward and began swinging their axes at the gate while other men entered the castle through the cellar ventilators and fought their way inside. Soon after the sappers smashed in the gate, the garrison was quickly rounded up and captured.[44] Led by General of Brigade François Roch Ledru des Essarts,[45] the fresh 18th Line Infantry Regiment entered Ebelsberg. One battalion flushed the Austrians out of the buildings while the other two battalions swung to the right to flank their enemies out of position.[46] Within half an hour, Legrand had secured the bridge and town gate.[34] However, the bitter fight continued as the French issued out of the east sides of the town and castle. The Austrians stubbornly held their positions on the heights and pushed the French back into the town with cavalry charges. By this time Legrand's Baden brigade had arrived,[46] led by General of Brigade Georges Kister and General-Major Harrant and consisting of 5,500 men in seven battalions.[45] Hiller ordered his howitzers and pioneers to set fire to those parts of the town not already burnt down.[46] Sometime after 4:00 PM, the infantry of Legrand and Claparède were cut off from all reinforcement by the conflagration,[47] which destroyed three-quarters of the houses. As Ebelsberg burned, Hiller issued orders for a retreat. Since Marulaz's cavalry was unable to get through the streets, the French could not mount an effective pursuit.[46] Ironically, one of the few surviving structures was the bridge.[47] Result The Austrians admitted 566 killed, 1,713 wounded, and 2,216 captured, for a total of 4,495 casualties. James R. Arnold pointed out that the French rarely gave accurate casualty figures, but numbered their losses in excess of 4,000, including 700 captured.[48] David Hollins counted Austrian losses as 8,340 and French casualties as 12,000 soldiers.[34][b] Francis Loraine Petre stated Austrian losses as 2,000 killed and wounded, plus 2,200 captured. He noted that Masséna reported 2,800 total losses, including 1,800 killed, giving an unlikely killed-to-wounded ratio. Of these, Legrand reported losing 701 soldiers, including only 23 from his Baden brigade. Petre wrote that Masséna claimed 7,000–8,000 prisoners, while Napoleon privately wrote Lannes that 4,000 Austrians were captured.[49] Digby Smith asserted that French casualties were 3,605 while Austrian losses were over 7,200, including 4,200 captured.[30] Another source gave Austrian losses as 6,000 and French losses as 3,000.[50] Petre listed total French strength as 22,100 and 20 guns, including Claparède's 8,400, Legrand's 10,000, Marulaz's 2,500, and Piré's 1,200. He gave the Austrians 22,000 troops and 70 guns, not counting Kienmayer's 4,500 infantry and 800 cavalry which Hiller allowed to leave the vicinity.[51] Smith estimated French numbers as 22,000 men and 48 guns. Smith's Austrian totals were marred by a serious typographical error.[30]  At 7:00 AM that morning, Lannes' engineers rebuilt the bridge at Wels. Unaware of what was happening at Ebelsberg, Napoleon ordered Bessières' cavalry followed by Oudinot's infantry to cross the new bridge and march for Steyr on the Enns.[52] Meanwhile, Molitor's division was on the road from Lambach to Kremsmünster, halfway to Steyr. When his troops reached there, they were diverted to Ebelsberg.[53] Because of a strong wind, other French forces in the area did not hear the noise of the battle. When Napoleon finally arrived in Ebelsberg at dusk, he was greeted by the sight of many wounded who had burned to death. Though he was accustomed to the sight of dead and dying soldiers, the emperor was aghast at the thickly strewn blackened corpses.[48] Napoleon was aware that the slaughter had been completely unnecessary, since Lannes' upstream crossing of the Traun would have forced Hiller to retire without a battle. The emperor chose not to publicly criticize Masséna and deliberately under-reported his losses. He understood that the aggressiveness and bravery displayed by his generals and troops would be needed in future actions, so he distributed awards. For his heroism, Lieutenant Guyot was named a Baron of the Empire and received a generous sum of money. At a review of the 26th Light the following day, the commander of the Imperial Guard Chasseurs à Pied paid Colonel Pouget a highly public complement.[54] Hiller slipped away from the French and burned the bridges at every major stream during his retreat. On 7 May, the Austrians crossed to the north bank of the Danube at Mautern an der Donau which is near Krems an der Donau.[23] Hiller left 10,000 troops under Dedovich to retreat on the south bank.[55] Archduke Maximilian held Vienna with 35,000 troops, including 14 Landwehr battalions and 6,000 Vienna militia under Feldmarschall-Leutnant Andreas O'Reilly von Ballinlough. There were also eight regular, six Landwehr, and six Vienna Volunteers battalions led by Dedovich; the II Reserve Armeekorps grenadier brigade commanded by Kienmayer and General-Major Konstantin Ghilian Karl d'Aspré; and four battalions and five squadrons jointly led by Nordmann and General-Major Joseph, Baron von Mesko de Felsö-Kubiny.[56] On the evening of 11 May, a French bombardment of Vienna completely unnerved Maximilian. The archduke abandoned the city on the 12th and withdrew with the greater part of the garrison to the north bank of the Danube, burning all the bridges. O'Reilly was left behind to carry out the surrender which included 13 generals, 180 officers, and 2,000 troops. The French found a military chest containing 4.5 million florins and large quantities of food, ammunition, and 100 cannon that Maximilian failed to carry off or destroy.[57] The next major action was the Battle of Aspern-Essling on 21 and 22 May.[58] CommentaryPetre called Hiller's generalship, "as feeble as it could possibly be" and that his troops were "miserably handled", noting that he should have crushed Claparède's division or ejected it from the town when the French were at a two-to-one disadvantage. Petre believed that during the rear guard action, the Austrians actually outnumbered Coëhorn, Marulaz, and Piré.[59] Robert M. Epstein called Hiller's counterattacks, "piecemeal and badly coordinated". He noted the large number of Austrian guns available (70) and their effective use to inflict losses on the French and to set fire to the town. Epstein wrote that the French ignored the lesson[23] and carelessly went into the battle at Aspern-Essling against an opponent who was capable of handling large numbers of cannons to good effect.[60] Napoleon indirectly criticized Masséna when he privately wrote to Lannes the next day, "As soon as I knew that they had had the stupidity to attack by force this famous position, and the only redoubtable one on the Traun which it was necessary to take, I feared some misfortune."[53] Arnold believed that Masséna's order to assault the town was "far worse than ill advised". He asserted that this blunder, which sent hundreds of soldiers to a pointless death, showed how far the marshal's abilities had declined from their peak.[48] Explanatory notesNotes
References
Further reading
External links
|
|||||||||||||||||||||||||||||||||||


